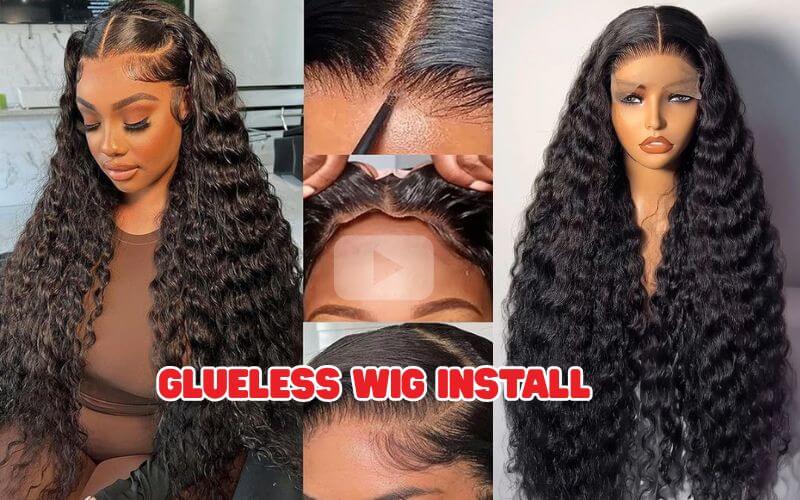
Glueless Wig Install – Full Beginner’s Guide
May
Wigs have evolved dramatically over the years, and glueless wigs are at the forefront of that transformation. This full beginner’s guide will walk you through the entire glueless wig install process. You’ll learn what materials you need, the steps to get a flawless fit, and tips to make your install last all day.
1. Prepare Materials before install Glueless Wig
Before you begin your glueless wig install, gather all the necessary tools and products. Having everything on hand will make the process smoother and help you avoid interruptions. Here’s your checklist:
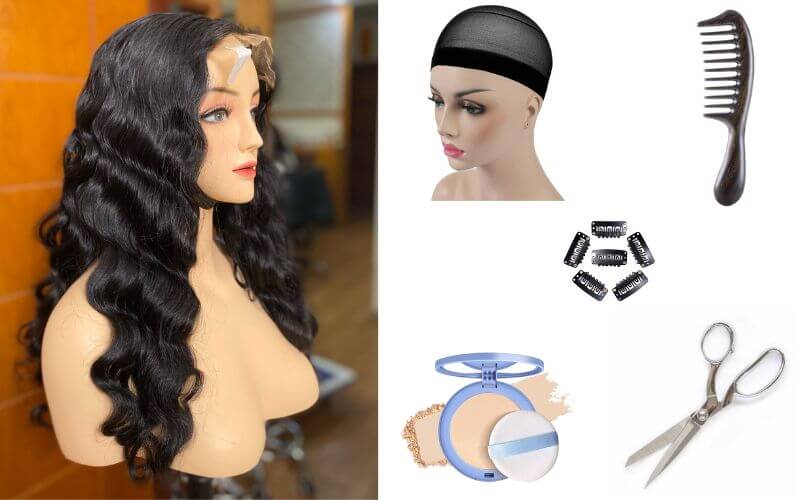
- Glueless wig (lace front, closure, or full lace)
- Wig cap (choose one that matches your scalp or wig base)
- Wide-tooth comb or wig brush
- Edge control gel or wax stick
- Hair clips or bobby pins
- Rubbing alcohol or a skin-safe cleanser
- Cotton pads
- Sharp scissors (for trimming lace if necessary)
- Blow dryer (optional but helpful)
- Wig band or elastic strap (for extra security)
- Hair mousse or styling foam
- Tweezers (for customizing the hairline)
- Makeup powder or foundation (to blend the lace)
>> READ MORE: What Is a Monofilament Wig? Everything You Need to Know
2. How to Install a Glueless Wig: Step-by-Step Tutorial
Step 1: Prepare Your Natural Hair
The foundation of a successful glueless wig install starts with your natural hair. Wash and deep condition it, then make sure it is fully dry and detangled. The flatter your natural hair is, the more realistic the wig will look.
For long or thick hair, braid your hair into cornrows or flat twists. For shorter hair, slicking it back with gel or styling it into small braids or twists is enough. Use bobby pins to secure any loose ends.
Avoid bulky styles under the cap as they can create visible bumps and distort the wig’s natural fall.
Step 2: Wear a Wig Cap
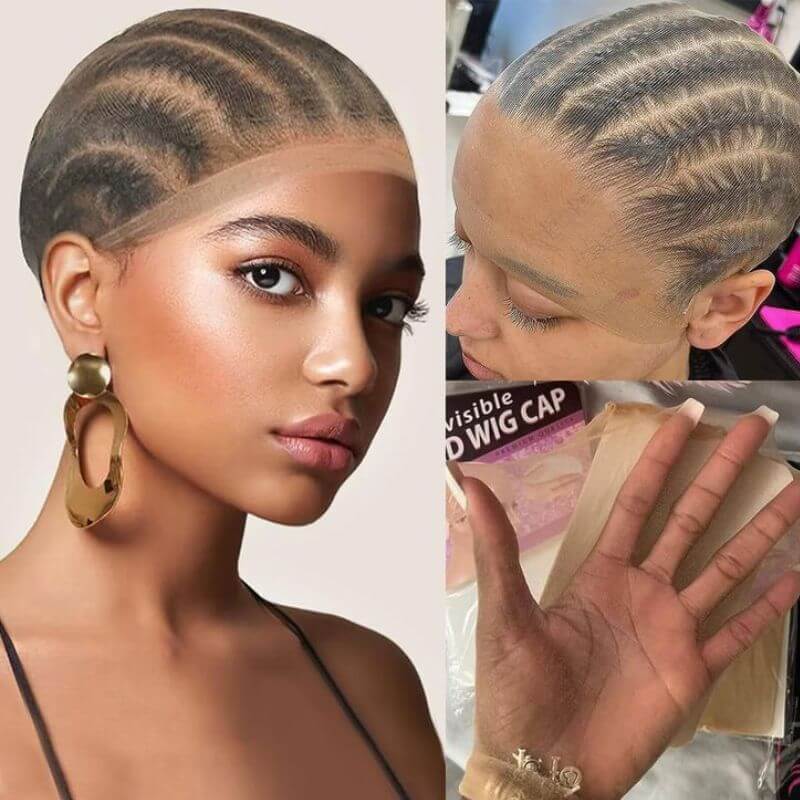
A wig cap is essential for protecting your natural hair and keeping your wig in place. It also creates a smooth surface for the wig to sit on.
Choose a wig cap color that blends well with your scalp or the lace color of your wig. Place the cap over your head, starting at your forehead, and gently pull it back over your hair.
Tuck in all loose hair, ensuring the cap fits snugly but comfortably without cutting off circulation.
Step 3: Secure the Wig Cap
To prevent the cap from sliding or bunching up, secure it with a few bobby pins at the temples, behind the ears, and the nape of your neck. If desired, apply a small amount of freeze spray or styling gel along the cap’s edge and use a blow dryer to set it in place. This step ensures your glueless wig install stays smooth and undisturbed.
If you want extra hold, you can wear a silicone wig grip underneath your cap for added friction and support.
Step 4: Clean & Prep Your Skin
Even though no glue is involved, it’s still important to prep your skin before applying the wig.
Using a cotton pad soaked in rubbing alcohol or micellar water, gently clean around your hairline. This removes any oil, sweat, or leftover makeup that might prevent the wig from adhering properly.
Allow your skin to dry completely before moving on to the next step. A clean surface helps the lace lay flatter and increases the longevity of your glueless wig install.
Step 5: Prepare the Wig
Before putting the wig on, inspect it thoroughly. If it’s a new wig, the lace may need to be trimmed. Use sharp scissors and trim carefully along the hairline, staying about 1/8 inch away from the hair.
Adjust the straps inside the wig cap to fit your head snugly. If your wig includes an elastic band or combs, make sure they’re positioned correctly for a secure fit.
Now is also the time to pluck the hairline for a more natural appearance, if necessary. Use tweezers to lightly remove extra hairs around the part or front edge. Be gentle to avoid damaging the lace.
Step 6: Apply the Wig

Put the wig on starting at the front of your head. Line up the lace with your natural hairline and center the part. Pull it over your wig cap and adjust until it sits securely in place.
Use the internal combs (if available) to secure the wig at the front, sides, and back. Adjust the straps inside to make the wig feel snug but comfortable.
For lace fronts or closure wigs, press the lace gently onto your forehead. If it shifts easily, use an optional wig band to hold it in place.
Step 7: Blend the Wig with Your Hairline
To achieve a flawless glueless wig install, blending is key. Start by laying your baby hairs with an edge control product or styling gel. Use a small brush or toothbrush to swoop and smooth them naturally.
You can also use a makeup brush or sponge to apply a small amount of powder foundation along the lace edge to make it disappear into your skin. This works especially well on lace fronts and HD lace wigs.
For an ultra-seamless finish, gently press the lace into your skin using a warm blow dryer on low heat for 10-15 seconds.
Step 8: Style the Wig
Now it’s time to customize your look. Depending on the wig type, you can straighten, curl, or wave it using heat tools (if heat-safe). For synthetic wigs, use styling foam, mousse, or finger-style as needed.
Define your part using a rat-tail comb and use concealer along the parting line for a scalp-like finish. Add layers or trim the ends if the cut needs shaping.
Human hair wigs can be styled like natural hair—updos, ponytails, curls, or sleek straight styles are all possible. Be creative but gentle to prolong the life of your wig.
>> READ MORE: 20+ Frontal Wig Styles That You Must Try
Step 9: Secure the Wig for Extra Hold
Although a glueless wig install doesn’t require glue, you can use non-adhesive methods for extra staying power. A wig band sewn inside the cap or worn underneath will help anchor the wig.
Alternatively, apply a small amount of freeze spray or styling mousse near the ear tabs and let it dry slightly before pressing down the lace. This gives you a firmer hold while keeping it glue-free.
If you’re wearing the wig all day or during physical activity, secure it with bobby pins at key points or wrap a scarf around your head for 10 minutes to “set” the lace.
Step 10: Final Touches
Do a last check to ensure everything looks polished. Smooth out any flyaways with mousse or a wax stick. Use tweezers to clean up the hairline or pluck stray hairs.
If needed, touch up your part with powder or concealer. Add a little shine spray to revive the hair’s natural luster.
Look in natural light or take a photo to inspect your finished glueless wig install. Adjust as needed and then you’re good to go!
3. Final though-Seamless Glueless Wig Installation
A flawless glueless wig install is completely achievable, even for beginners. With the right tools, a step-by-step approach, and a little patience, you can enjoy all the benefits of wearing a wig without any glue, mess, or stress. Glueless wigs are not only beginner-friendly, but they’re also safer for your hairline, reusable, and versatile for daily or occasional wear. Now that you’ve got the technique down, you can confidently wear your wig knowing it looks natural, feels secure, and protects your real hair underneath.
Ready to switch it up? With a glueless wig, it only takes a few minutes to transform your entire look—no glue required.
Hi, I’m from Korea and looking for a reliable wig OEM manufacturer.
I’m interested in ordering human hair wigs with Korean labeling.
Could you please send me your MOQ, unit price, available hair types, and shipping lead time?
Yes. Do you have whatsapp? Can I send you more details via whatsapp? This is my number +84936085069. Thank you!